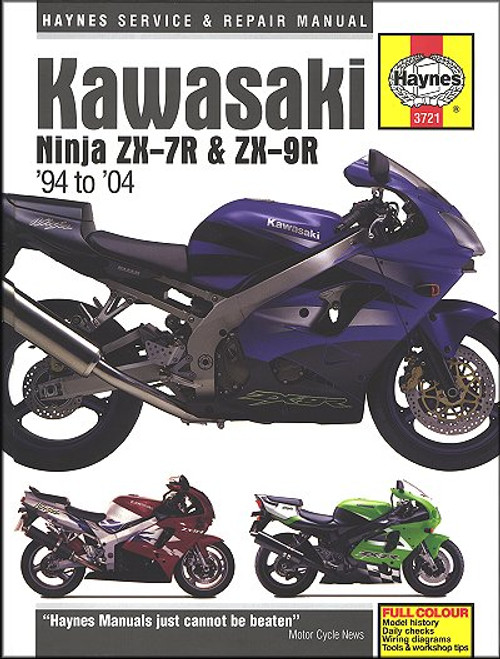
The 1994-2004 Kawasaki Ninja ZX7R, ZX9R DIY repair manual by Haynes covers:
Book Excerpt: 1994-2004 Kawasaki Ninja ZX7R, ZX9R Repair and Service Manual RADIATOR PRESSURE CAP: CHECK
GENERAL INFORMATION
FRAME: INSPECTION AND REPAIR
FOOTRESTS AND BRACKETS: REMOVAL AND INSTALLATION
Subject: 1994, 1995, 1996, 1997, 1998, 1999, 2000, 2001, 2002, 2003, 2004 Kawasaki Ninja ZX7R, ZX9R service, maintenance, repair. ISBN-10: 1844252604 | ISBN-13: 9781844252602 | Haynes 3721
- Kawasaki Ninja ZX7R (ZX750P), 1996-2003
- Kawasaki Ninja ZX9R (ZX900B), 1994-1997
- Kawasaki Ninja ZX-9R (ZX900C), 1998-1999
- Kawasaki Ninja ZX-9R (ZX900E), 2000-2001
- Kawasaki ZX-9R (ZX900F,) 2002-2004
Book Excerpt: 1994-2004 Kawasaki Ninja ZX7R, ZX9R Repair and Service Manual RADIATOR PRESSURE CAP: CHECK
If problems such as overheating or loss of coolant occur, check the entire system as described in Chapter 1. The pressure cap opening pressure should be checked by a dealer with the special tester required to do the job. If the cap is defective renew it. COOLANT RESERVOIR: REMOVAL AND INSTALLATION REMOVAL | ZX-7R AND ZX-9R B MODELS
- Remove the right side lower faring panel (see Chapter 8)
- Place suitable container underneath the reservoir. release the clip, then detach the radiator overflow hose from the base of the reservoir and allow the coolant to drain into the container (see illustration).
- Slacken and remove the mounting screws and remove the reservoir, complete with its cover and breather hose (see illustration). On ZX-9R B models, recover the spacers which are fitted between the reservoir and engine (see illustration).
GENERAL INFORMATION
Front suspension is by a pair of oil-dampened telescopic forks which have a conventional damper system and are adjustable for spring pre-load and compression and rebound damping. The swing arm is mounted onto the frame. The drive to rear wheel is by chain.
FRAME: INSPECTION AND REPAIR
- The frame should not require attention unless accident damage has occurred. In most cases, frame renewal is the only satisfactory remedy for such damage. A few frame specialists have the jigs and other equipment necessary for straightening the frame to required standard of accuracy, but even then there is no simple way of assessing to what extent the frame may have been over-stressed.
- After the machine has accumulated a lot of miles, the frame should be examined closely for signs of cracking or splitting at the welded joints. Loose engine mount bolts can cause ovaling or fracturing of the mounting tabs. Minor damage can often be repaired by specialist welding, depending on the extent of the damage.
- Remember a frame which is out of alignment will cause handling problems. If misalignment is suspected as the result of an accident, it will be necessary to strip the machine completely so the frame can be thoroughly checked.
FOOTRESTS AND BRACKETS: REMOVAL AND INSTALLATION
RIDER'S FOOTREST: REMOVAL/INSTALLATION
- Remove the retaining clip from the footrest pivot pin, then withdraw the pivot pin and remove the footrest, noting the fitting of the return spring.
- Installation is the reverse of removal.
Subject: 1994, 1995, 1996, 1997, 1998, 1999, 2000, 2001, 2002, 2003, 2004 Kawasaki Ninja ZX7R, ZX9R service, maintenance, repair. ISBN-10: 1844252604 | ISBN-13: 9781844252602 | Haynes 3721
TABLE of CONTENTS:
LIVING WITH YOUR KAWASAKI NINJA
Introduction
- Identification numbers
- Buying spare parts
- Engine/transmission oil level check
- Brake fluid level checks
- Suspension, steering and final drive checks
- Legal and safety checks
- Tire checks
- Specifications
- Recommended lubricants and fluids
- Maintenance schedule
- Component locations
- Maintenance procedures
- Engine, clutch and transmission
- Fuel and exhaust systems
- Ignition system
- Steering
- Suspension
- Final drive
- Wheels
- Brakes
- Tires
- Frame and bodywork


