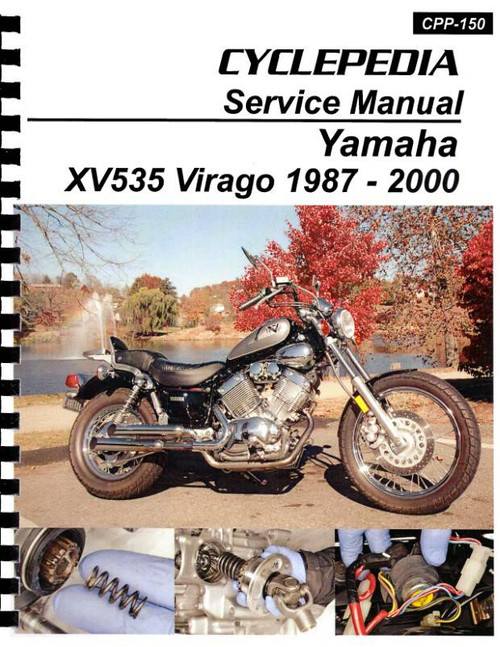
The Yamaha Virago Haynes Service and Repair Manual covers a variety of models of cruisers made between 1981 and 2003. The Haynes manual delivers a comprehensive overview of all of the bike's systems from the brakes to the belts. The manual includes detailed illustrations, step-by-step instructions and helpful tips to make working on your Yamaha Virago XV V-Twin cruiser a breeze whether you're a DIY mechanic or an experienced professional. This manual covers the following 1981-2003 Yamaha Virago XV V-Twin cruiser models: U.S. models:
- Yamaha XV535 (XV535S), 1987-2000
- Yamaha XV700, 1984-1987
- Yamaha XV750, 1981-1983, 1988-1997
- Yamaha XV920R, Virago, 1981-1983
- Yamaha XV1000, 1984-1985
- Yamaha XV1100, 1986-1999
- Yamaha XV1100S, 1997-1998
U.K. models:
- Yamaha XV535 (XV535S), 1988-1997
- Yamaha XV535DX, 1998-2003
- Yamaha XV750SE, 1981-1983
- Yamaha XV750, 1992-1996
- Yamaha TR1, 1981-1985
- Yamaha XV1000, 1986-1989
- Yamaha XV1100, 1989-1998
All Haynes manuals sold by The Motor Bookstore are backed by our 30-day money-back guarantee. Manuals are priced low and shipping is always free to the continental 48 states.
Book Excerpt: 1981-2003 Yamaha Virago XV535, XV700, XV750, XV920, XV1000, XV1100 Repair Manual FUEL TANK-CLEANING AND REPAIR
- All repairs to the fuel tank should be carried out by a professional who has experience in this critical and potentially dangerous work. Even after cleaning and flushing of the fuel system, explosive fumes can remain and ignite during repair of the tank.
- If the fuel tank is removed from the vehicle, it should not be placed in an area where sparks or open flames could ignite the fumes coming out of the tank. Be especially careful inside garages where a natural gas-type appliance is located, because the pilot light could cause an explosion.
IDLE FUEL/AIR MIXTURE ADJUSTMENT: GENERAL INFORMATION
- Due to increased emphasis on controlling motorcycle exhaust emissions, certain governmental regulations have been formulated which directly affect the carburation of this machine. In order to comply with the regulations, the carburetors on some models have a metal sealing plug pressed into the hole over the pilot screw (which controls the idle/fuel mixture) on each carburetor, so they can't be tampered with. These should only be removed in the event of a complete carburetor overhaul, and even then the screws should be returned to their original settings. The pilot screws on other models are accessible, but the use use of an exhaust gas analyzer is the only accurate way to adjust the idle/fuel mixture to be sure the machine doesn't exceed the emissions regulations.
- If the engine runs extremely rough or blows black smoke at idle or continually stalls and if a carburetor overhaul does not cure the problem, take the motorcycle to a Yamaha dealer service department or other repair shop equipped with an exhaust gas analyzer. They will be able to properly adjust the idle and restore low speed performance.
BRAKE HOSE: INSPECTION AND REPLACEMENT
INSPECTIONREPLACEMENT
- Once a week, or if the motorcycle is used less frequently, before every ride, check the condition of the brake hose.
- Twist and flex the rubber hoses (see illustration 3.2b) while looking for cracks, bulges and seeping fluid. Check extra carefully around the areas where the hoses connect with the banjo fittings, as these are common areas for hose failure.
- Inspect the metal banjo fittings connected to brake hoses. If the fittings are rusted, scratched or cracked, replace them.
- The brake hose has a banjo fitting on each end of the hose. Cover the surrounding area with plenty of rags and unscrew the union bolt on either end of the hose. Detach the hose from any clips that may be present (see illustration3.2b) and remove the hose.
- Position the new hose, making sure it isn't twisted or otherwise strained, between the two components. Install the union bolts, using new sealing washers on both sides of the fittings, and tighten them to the torque listed in this Chapter's specifications.
- Flush the old brake fluid from the system, refill the system with the recommended fluid (see Chapter 1) and bleed the air from the system (see Section 8). Check the operation of the front brake carefully before riding the motorcycle.
BRAKE SYSTEM BLEEDING
- Bleeding the brake is simply the process of removing all the air bubbles from the brake fluid reservoirs, the lines and the brake calipers. Bleeding is necessary whenever a brake system hydraulic connection is loosened, when a component or hose is replaced, or when the master cylinder or caliper is overhauled. Leaks in the system may also allow air to enter, but leaking brake fluid will reveal their presents and warn you of the need for repair.
- To bleed the brakes, you will need some new, clean brake fluid of the recommended type (see Chapter 1), a length of clear vinyl or plastic tubing, a small container partially filled with clean brake fluid, some rags and a wrench to fit the brake caliper bleeder valves.
Subject: 1981, 1982, 1983, 1984, 1985, 1986, 1987, 1988, 1989, 1990, 1991, 1992, 1993, 1994, 1995, 1996, 1997, 1998, 1999, 2000, 2001, 2002, 2003 Yamaha Virago XV535, XV700, XV750, XV920, XV1000, XV1100 service, maintenance, repair. ISBN-10: 0857339036 | ISBN-13: 9780857339034 | Haynes M802 Also available: 1981-2003 Yamaha Virago 535-1100 Repair Manual by Clymer.
- Identification numbers
- Buying spare parts
- Pre-ride checks
- Engine oil level
- Brake fluid levels
- Tires
- Bike specs
- Routine maintenance and servicing
- Specifications
- Lubricants and fluids
- Maintenance schedule
- Component locations
- Maintenance procedures
- Engine, clutch and transmission
- Fuel and exhaust systems
- Ignition system
- Frame and suspension
- Brakes, wheels and final drive
- Fairing and bodywork
- Electrical system
- Wiring diagrams
- Tools and workshop tips
- Security
- Storage
- Troubleshooting


